Slovak Honey Cake with Caramel Buttercream and Roasted Nut Streusel Topping

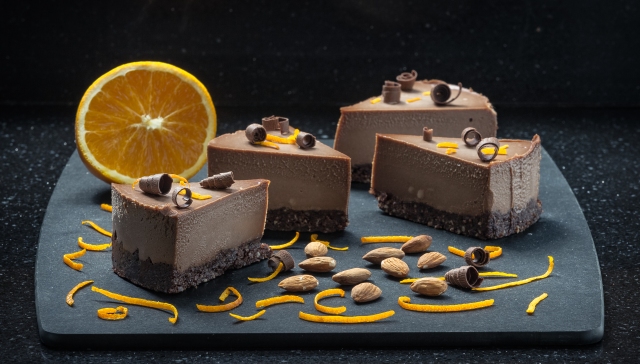
Christmas is almost here! Tis the season to be overwhelmed – there is still so much to do and never enough time (and energy) to do it. I love Christmas – the traditions, the smells, the lights, and the family time… just getting there can be a bit too taxing. The calendar is filling up, and I feel like I’m terribly behind this year. Haven’t really started baking yet – I know from experience that if I get into Christmas baking too early, my men who eat like locusts will push right behind me and consume everything in sight, and I’ll have to break out the rolling pin three days before Christmas anyway. Same with cleaning – it’s just a never ending losing battle. No point in needlessly spending precious energy too soon 🙂

This cake is a forerunner of the serious Christmas cookie baking marathon that will take place at our house next week. There are desserts that simply cannot be absent from a holiday table in a Slovak household, and this is definitely one of them. However, its preparation is time consuming, and involves lots of fighting with a fragile honey dough: first with a rolling pin, when you need to roll out 4 – 6 thin layers of a soft sticky dough, and when that’s done, you need to convince said layers to agree to be transferred on and off baking sheets without tearing. All that rolling as well as need for careful handling can be daunting, and when you’d heaven forbid like to de-glutenize the cake on top of that, it holds true hundred times as much. But since this cake is a Christmas must-have for Mr. Photographer, last year I went on a mission to find a way to make it gluten-free for him, even if it should kill me. (In case you’re wondering, food is my love language, and I’m willing to go great lengths to make good food for people I care about. I’ve wished many times upon seeing the sad state of my bathrooms I could switch to cleaning love language for a while, but alas, I don’t see that happening any time soon).

Anyway, in my search I learned that many Slovak ladies must dislike the fighting the honey dough with a rolling pin just as much as I do, because some wonderfully clever soul apparently succeeded in modifying the recipe from a dough that needs to be rolled out to a honey sponge cake with seemingly no adverse effects to the appearance and taste. I made the cake in both gluten and gluten-free versions last year and it was a big success; I was quite happy with it and haven’t anticipated to ever need another recipe. Well, since before the beginning of November my inbox has been overflowing with must try Christmas recipes, and among them I bumped into yet another best recipe for the Slovak honey cake. This time, cake layers were rolled, but the author claimed the rolling to go swimmingly easy, and to top it off, there supposedly wasn’t any wait time till the cake layers soften under the filling, so the cake was to be consumable right away. Of course I was intrigued and had to try it! I found all the claims to be absolutely true, and last year’s favorite had to concede to a new winner. As far as I’m concerned, this honey cake recipe truly is the best: Gluten-full or gluten-free, the rolling was a breeze, and as promised, the cake layers didn’t get hard when cooled, and were soft as a pillow from the get go. I suspect the rum syrup I very generously soaked them with might have had something to do with it 🙂

So this version is another take on a traditional Slovak Christmas delicacy. And since men are inherently simple, I don’t think I’ll need to do much more for Mr. Photographer’s Christmas 🙂 If you like honey, and caramel, and nuts (and who doesn’t?!), and have time to spare in the upcoming pre-Christmas week, give it a try; it’s heaven in your mouth delicious!

img-2016-12-04-8759

Slovak Honey Cake with Caramel Buttercream and Roasted Nut Streusel Topping

Honey dough for 5 cake layers:
  • 45o g (1 lb.) all-purpose flour (for gluten-free cake, see Note)
  • pinch salt
  • 1 ½ teaspoons baking soda
  • 1 teaspoon dark cocoa powder
  • 180 g (6.3 oz.) powdered sugar
  • 180 g (6.3 oz.) unsalted butter, softened
  • 1 large egg
  • 6 tablespoons liquid honey
  • 4 tablespoons whipping cream
Caramel Buttercream:
  • 1 can sweetened condensed milk (397 g, 14 oz.)
  • 70 g (2.5 oz.) dry roasted ground walnuts/pecans
  • 250 g (8.5 oz.) unsalted butter, room temperature
Rum Syrup:
  • 2 ½ tablespoons granulated sugar
  • 1.5 dl (5 oz.) boiling water
  • 50 ml (1.7 oz.) dark rum
Roasted Nut Streusel:
  • 30 g (1 oz.) dry roasted ground walnuts/pecans
  • 50 g (1.7 oz.) honey cake crumbs (scraps of the remaining dough, re-rolled, baked, then finely ground)

img-2016-12-03-8755

Method:
  1. The day before, caramelize the sweetened condensed milk: Place an unopened can of sweetened condensed milk in a pot of water, so that the can is fully submerged. Cover the pot, bring the water to a boil, and simmer for 2 hours. Remove the can from water, let it cool, and refrigerate, still unopened, till the next day. Next day, let the can come to room temp and continue with the recipe.
  2. Make the honey cake layers: Place butter, sugar, egg, honey, and cream into a deeper saucepan. Place the saucepan into a bigger pot filled with water, creating a water bath. Over a medium heat, warm up the mixture, whisking constantly. Do not boil.
  3. Combine flour, cocoa, salt, and baking soda in a bowl of your stand mixer. Pour the warm honey butter mixture into the dry ingredients, and mix up a soft dough. Gather the dough into a ball and wrap it up in saran wrap. Set it aside to cool slightly.
  4. Get ready 2 or 3 bigger baking sheets and preheat the oven to 350 °F (180 °C). Cut 5 sheets of parchment paper. With a pencil, trace 22 cm (8.5 inches) circle on each of the sheets and turn the paper over, so that the dough won’t touch the pencil marks. Divide the dough into 5 equa portions, each about 190 g (6.7 oz.)
  5. Take one sheet of parchment, place one portion of dough into the center of the pre-traced circle and roll it out. You can flour the dough or your rolling pin if you need to, but I found it wasn’t necessary. Reserve the scraps of dough for later.
  6. Bake the cake in a preheated oven for about 4 – 6 minutes, till the edges turn light golden brown. The dough will still be very soft, it will firm up when cooled. Don’t overbake the layers, or they will be hard. Let the circle slightly cool on the baking sheet, and then remove it from the sheet, but let it rest on the parchment. Prepare all the remaining layers in the same way and let them cool. Re-roll the scraps into an oval/circle and bake it as well. Don’t try to handle the dough while it’s still hot/warm, or it will break. The dough is very easy to handle when cooled. (The cake layers can be made in advance and frozen with sheets of parchment between them. Defrost them completely before filling them with buttercream.)
  7. While the cake layers are cooling, prepare the rum syrup and caramel buttercream. For the syrup, dissolve sugar in hot water. Let the sugar syrup cool and then pour in the rum and combine. For the buttercream, whip the butter until light and fluffy. By spoonfuls, add in the caramelized condensed milk, whisking constantly. Add in the ground nuts and combine.
  8. Assembling the cake: Place the first cake layer onto a flat surface, covered with parchment. Smear the cake with approx. 20 ml (0.6 oz.) rum syrup, and coat it with 1/5 of the buttercream. Take second cake layer, brush it with 20 ml (0.6 oz.) rum syrup, and then use another 20 ml (0.6 oz.) syrup to soak the other side. Place the cake on top of the buttercream. Continue assembling the cake, using 2 x 20 ml (0.6 oz.) rum syrup for each layer, and covering it with 1/5 of the caramel buttercream. Frost the top and the sides of the cake and set it aside.
  9. For the streusel, process the baked scrap of honey dough into crumbs, and combine them with ground nuts. Scatter the streusel evenly all over the cake, covering top and the sides, pressing the streusel lightly into the buttercream. Let the cake stand in a cool place for about 2 hours to let the buttercream soak into the layers a little (I usually cover it with a big bowl and put it in the garage), and then refrigerate for 12 – 24 hours before cutting and serving. The remaining cake can be frozen.
Note:

For gluten-free cake, I used Bob’s Red Mill 1 to 1 gluten-free flour. It already contains gums, so no other adjustments were necessary. When I don’t have time to mix my own flour mix, it is my absolute favorite flour mix for baking.

Eggnog Cheesecake with Gingersnap Crust

I know, I’m getting way ahead of myself. I should be making pumpkin pies and complaining about the crust not turning out as flaky as I’d like it to, stuffing the bird, and pondering ways to upgrade the forever boring green bean casserole. And I am or will be doing that – with the exception of pumpkin pie, which nobody at our house is too fond of. I know, that’s so un-American… and rather surprising, too, because I literally adore everything pumpkin, soups, muffins, cakes, all but the actual pumpkin pie. I find it too wet and overly sweet, honestly a waste of the great pumpkin, which could be used in hundreds of other delicious ways. And since I’m in a confession mode – even our Thanksgiving will be very low-key. Yes, there will be cooking, because, well, with three constantly hungry men in the house there really isn’t a way to get out of that, but cooking aside, Thanksgiving to us is just another Thursday – with more food that is. And we sure are grateful for that 🙂

Mr. Photographer found the recipe for this cheesecake somewhere on the internet, and when I saw it, I immediately decided to heck with rules, I’m definitely not going to wait another month to make this beauty. Frankly, it might be a week before Thanksgiving, but when you look around in the stores, it’s beginning to look a lot like Christmas anyway. And with everything that’s been going on in the world around us lately, a little (or a lot!) of eggnog could go a long way to help us cope. Everyone fights his own way… my superpower is to bring people together with food, so that’s what I plan on continuing to do.

Making homemade eggnog is the easiest task of all… at least eggnog the Slovak way, which doesn’t require cooking. You simply whisk egg yolks with sweetened condensed milk and vanilla, and pour in a good rum. Done. The hardest part is the waiting afterwards, because it’s best to bottle the eggnog and let it sit for two weeks before serving. It thickens, the flavors will have chance to marry, and it’ll be absolutely delicious. Please don’t leave me over the irresponsible practice of consuming raw egg yolks – according to some statistics I found, if I eat three raw egg yolks a day (which I don’t), it would take me more than 27 years before I’d actually run across one with salmonella. I’ve decided the best things are worth the risk, and have been happily sipping on homemade eggnog for years. And in any case, we’ll be pouring the eggnog into the cheesecake filling and baking it, so any potential danger will be eliminated… along with the alcohol content unfortunately 🙂

So keep calm and have some eggnog – first in the cheesecake, of course, but don’t forget to pour yourself some in a glass, too. It might help you stay sane during the upcoming busy holiday season 🙂

img-2016-11-17-8685

Eggnog Cheesecake with Gingersnap Crust

(adapted from http://www.rosebakes.com)

Homemade Eggnog:
  • 2 cans (396 g, 14 oz. each) sweetened condensed milk
  • 5 egg yolks
  • 2 teaspoons vanilla extract
  • 500 ml (2 cups, 16 oz.) good quality rum
Gingersnap Crust:
  • 340 g (12 oz.) gingersnap cookies (I used gluten-free ones)
  • 6 tablespoons (85 g, 3 oz.) unsalted butter, softened
  • ¼ cup (55 g, scant 2 oz.) granulated white sugar
  • ¼ teaspoon cinnamon
Cheesecake Filling:
  • 4 bricks (8 oz., 225 g each) cream cheese, softened
  • 4 eggs, room temperature
  • 1¼ cups granulated white sugar
  • 1¼ cups eggnog, see Note
  • 3 tablespoons all-purpose flour (I used gluten-free flour mix)
  • 1 teaspoon rum (or rum flavoring)
  • ½ – 1 teaspoon cinnamon (to taste)

img-2016-11-17-8677

Method:
  1. To make the eggnog, whisk together sweetened condensed milk, the egg yolks, and vanilla. Pour in the rum and combine. (It is best to make the eggnog in advance and let it sit for 2 weeks so that it has time to thicken.)
  2. To make the crust, line a 25 cm (10 inch) springform pan with parchment paper and lightly butter the sides. Crush the cookies in a food processor and transfer them to a bowl. Add in the remaining ingredients and mix until the mixture is sticky and holds together. Press the cookie mixture on the bottom and up the sides of your pan. (I use a glass for this task – the crust looks nicer and “cleaner” this way). Set aside. Preheat the oven to 325 °F (162 °C) and place a pan with water on the bottom rack.
  3. Make the filling: In a large bowl, mix the cream cheese until light and fluffy. One by one, add in the eggs, mixing well after each addition. Pour in the eggnog and mix until smooth. Add the remaining ingredients and combine.
  4. Pour the filling onto the crust in your pan and smooth out the top. Bake the cheesecake for 1 hour and then turn the oven off and crack the oven door. Let the cheesecake in the oven for 1 additional hour and then take it out and let it cool completely before chilling for at least 6 hours.
  5. Decorate the cheesecake with whipped cream, ground cinnamon, chocolate shavings or fruit and serve.
Note:

My eggnog was not as thick as I would have liked, so I reduced its amount to 1 cup only, and it worked well. See how thick/thin your filling is and make adjustments as needed.

Try not to overmix the cheese filling – if you do, there will be too many air bubbles in the filling, and the cake puffs up too much when baking and then falls when it cools. The dreaded cracks might also develop on the surface. The water in another pan in the oven as well as gradual cooling of the cheesecake in the oven might help to prevent them, but if you end up with cracks in your cheesecake, don’t lose heart: you can repair it with hot water and an offset spatula, and there are many ways to cover them too – you may mix up some dark chocolate ganache glaze and pour it over the top, or just pile up fresh fruit on the cheesecake. Cracks or no cracks, the cheesecake is going to be delicious!

Pear Upside Down Cake with Pomegranate Caramel and Walnuts

Last weekend marked our 21st wedding anniversary. Technically, we reached adulthood, and should conduct ourselves in line with our adult status… but honestly, especially when things don’t go the way we want them to and disagreements ensue, we can clearly see just how much that’s not the case. Those heated (and hated) squabbles are a perfect mirror to show us how immature we can still be and how much there still remains to learn. We certainly don’t possess the secret to a happy marriage… but that doesn’t mean we haven’t grasped anything in our years together or that we wouldn’t be growing. We are. Every day.

Marriage is hard work. It’s a relationship like no other, and will teach you more about yourself than you’ve ever wanted to know. It will show you just how much power you have over the heart of the other person and what can happen if you’re not careful. Seeing the pain in the eyes of your closest companion hurts… but knowing you’re the one who’s inflicted it, and that you’ll more than likely do it again hurts that much more.

If I know something after all these years, it’s that being happily married is not the same as living happily ever after. Rather, it’s knowing that someone has your back… realizing that you’ve been seen at your worst and you’re still loved. It’s having that safe place next to someone, and even more importantly, trying to be that safe space for someone else. Still learning that one… and feeling like the slowest student at times.

Sometimes it feels like a never ending one step forward and two steps back dance. It can feel tiring and even pointless trying your hardest to build something day after day, only to see it come crashing down a little later. But here is the thing – if you’re lucky enough to have someone who’s willing to pick up the pieces with you and start over, step by step, brick after brick – then after time, the walls will be back up again. And when the sun breaks through the windows, it lets you see just how tall they are and how far you’ve come. Sure, they’re not perfect… who knows, they may even be a tad crooked and there are cracks in them here and there… but it’s your home, home that you’ve built together, and it’s warm and cozy nonetheless.

To David: Thank you for staying in the ring with me.

*****

And since marriage has the power to turn your life upside down… :-),  we celebrated with this fall-ish upside down cake! Pears go phenomenally with walnuts, and the sweet caramel syrup soaked into the cake and together with the poached fruit and buttermilk made the cake super moist. I think next time I might try apples or plums in place of pears; the cake is versatile and I’m sure it’ll be super yummy either way!

img-2016-10-09-7546

Pear Upside Down Cake with Pomegranate Caramel and Walnuts

Cake:
  • 230 g (8 oz.) all-purpose gluten-free flour
  • 1 ½ teaspoon baking powder
  • ½ teaspoon baking soda
  • ½ teaspoon salt
  • ½ teaspoon ground cinnamon
  • ½ teaspoon ginger
  • ¼ teaspoon cardamom
  • ¾ cup finely chopped/coarsely ground walnuts
  • 113 g (4 oz., 8 tablespoons) softened unsalted butter
  • 2 large eggs, 1 separated, 1 left whole
  • 150 g (5 oz.) powdered sugar
  • 1 teaspoon vanilla extract
  • 1 teaspoon fresh orange zest
  • ½ cup buttermilk
Pomegranate Molasses:
  • 2 cups (500 ml) pomegranate juice
  • ¼ cup granulated sugar
  • 2 tablespoons fresh lemon juice
Pomegranate Caramel Syrup:
  • ¼ cup premade pomegranate molasses
  • 3 tablespoons fresh orange juice
  • ¼ cup granulated sugar
  • 2 tablespoons unsalted butter

+ 4 small Bosc pears, peeled, cored, and halved

img-2016-10-09-7548

Method:
  1. First, make pomegranate molasses: In a small saucepan, combine all the ingredients, and cook, stirring occasionally, until the mixture thickens and becomes syrupy, about 3o minutes. Don’t let all the liquid evaporate; watch it closely at the end, so it doesn’t turn into caramel and burn. Let the mixture cool slightly, and transfer it into a glass jar. (The molasses can be made in advance and stored in the refrigerator. Alternatively, you can use store bought pomegranate molasses).
  2. Prepare molasses caramel syrup: In a big shallow pan, combine all the ingredients listed. Cook to melt the butter and dissolve the sugar, about 2 minutes. Add the pears, cut side up, and cook undisturbed until they start to release their juices, about 3 minutes. Turn them over, and cook just until slightly softened, about 3 minutes more. Remove the pears from the syrup and let them cool slightly.
  3. Return the pan to medium heat and cook the liquid until thickened and syrupy, about 3 minutes, depending on the juiciness of the pears. Set the syrup aside.
  4.  Line a 9-inch (22 cm) round springform pan with parchment paper, butter and flour the sides. Preheat the oven to 35o °F (176 °C). Arrange the pears, cut side down onto the parchment in the pan. Pour the caramel syrup over the fruit and chill the springform pan while you prepare the cake batter to set up the syrup.
  5. Prepare the cake batter: Using an electric mixer, whip butter and sugar until light and fluffy. Add in vanilla, orange zest, 1 whole egg, and 1 egg yolk. Lastly, slowly pour in the buttermilk and combine.
  6. In a small bowl, combine dry ingredients except nuts. Whip the egg white until firm peaks form. Fold the dry ingredients into the egg mixture alternating with the whipped egg white. At the end fold in the walnuts. The batter should be fairly thick.
  7. Pour the cake batter carefully over the pears in the pan and smooth out the top. Bake the cake in the preheated oven until the cake tester inserted in the center comes out clean, about 30 minutes. Transfer to a wire rack and let cool in the pan for 15 minutes.
  8. Run knife around edges and open the springform mechanism. Invert the cake onto a plate and carefully remove the parchment paper. Serve with cinnamon whipped cream if desired.

img-2016-10-09-7547


Vanilla Cake with Sour Cream Yogurt Frosting and Fresh Fruit

September is a celebration month at our house. No, I don’t celebrate the boys going back to school… 🙂 Truth to be told, I’ve gotten used to the extra chatter, extra pairs of hands, not to mention the extra sleep I’ve been getting in the mornings. I’m always a little nostalgic at the end of August – I’m a summer girl at heart, and even though I enjoy the fall here in the Pacific Northwest and love the beautiful color show the turning leaves put out every year, I know we won’t be able to escape the rain that’s coming after. But as fate would have it, all my men were born in September (two within days of each other!), and so we can’t really be too sad about summer being over around here, because we’re too busy counting down until someone’s birthday.

Birthday is always a highlight of a person’s year, I suppose, regardless of the day it falls on. Having said that, growing up I always felt a little sorry for the kids whose Christmas and birthday were rolled into one… I couldn’t help but feel they were a bit cheated. But early September Birthday? Awesome! It’s not so hot anymore that you have to worry about the buttercream frosting melting and the cake you spent hours on falling apart before your guests even finish singing Happy Birthday, but you can still celebrate outside and won’t get drenched or freeze to death. Oh, and if you were born in September, you can have your cake and eat it too! Just think about it – the bikini season is over, no need to fret over some fat around your waistline. Any potential muffin top can be easily and comfortably hidden under those wonderfully loose fall sweaters.

Not that it would ever occur to my men (or any man, really!) to worry about something like that. Mr. Photographer asked for a light fruity cake, and I’m sure he didn’t go for it just because the contrasting berries and grapes would look good in pictures. If he sees cake (or cheese! or wine!), you bet he’s going to have some, even if it’s five minutes before midnight. He truly is a carpe diem person, and I love that about him. The cake I made for him (and my other man-son that almost shares birthday with his father) is rather simple: Lemon scented vanilla cake with yogurt – sour cream filling, filled with summer fruit galore. This kind of cake is quite often baked back home during summer, and for a very good reason – it’s simple and quick to make, a little sweet, a little tart, and a whole lot creamy. Go bake some, and then cut yourself a slice, put your feet up, and enjoy life: every day of it it’s delicious, and on your birthday it holds true twice as much!

 img-2016-09-04-0373-Edit

Vanilla Cake with Sour Cream Yogurt Frosting and Fresh Fruit

Cake:
  • 4 eggs, room temp, separated
  • 120 g (4 oz.) powdered sugar
  • 100 ml (3.3 oz.) mild tasting oil (melted & cooled butter)
  • 2 teaspoons fresh lemon zest
  • 2 teaspoons vanilla
  • 100 g (3.5 oz.) all-purpose gluten-free flour
  • 1 teaspoon xanthan/guar gum (omit if your mix contains it already)
  • 1 pkg. Dr.Oetker Vanilla Pudding (37 g), or other powdered gluten-free pudding by weight
  • ½ teaspoon salt
  • 10 g (0.35 oz.) baking powder
  • ½ teaspoon cream of tartar
Filling:
  •  500 ml (about 2 cups) full-fat sour cream
  • 250 ml (8 oz., about 1 cup) full-fat Greek yogurt (yogurt and sour cream can be used interchangeably)
  • 2 teaspoons vanilla
  • 60 g (over 2 oz.) powdered sugar
  • 300 ml (10 oz.) heavy whipping cream
  • 20 g (almost 3 pkg.) Knox powdered gelatin
  • 100 ml (3.3 oz.) cold water
Lemon Syrup:
  • ¼ cup water
  • ¼ cup white sugar
  • 1/3 cup lemon juice
Gelatin Glaze:
  • 1 pkg. Knox unflavored gelatin
  • ¼ cup cold water
  • ¼ cup very hot water
  • 1 tablespoon liquid honey
  • 1 tablespoon lemon juice

+ ¼ cup apricot preserves, to spread on the cake before fruit and filling
mixed fruit of your choice for filling the cake and for decoration (I used 2 sliced bananas and 2 cups sliced strawberries inside the cake, and decorated with peaches, blueberries, grapes, and strawberries

img-2016-09-03-6420

Method:
  1. For the cake, line a 26 cm (10-inch) round springform pan with parchment paper. Butter the sides of the pan. Preheat the oven to 350 °F (176 °C).
  2. In a medium bowl, whisk together flour, pudding powder, and baking powder. Set aside.
  3. In a bowl of your stand mixer, whisk the egg yolks with sugar until very thick and light yellow in color, about 10 minutes. Gradually start adding the oil (liquid butter), whisking constantly. Mix in the lemon peel and vanilla. Set aside.
  4. Whip the egg whites with salt and cream of tartar until firm peaks form.
  5. In three additions, fold the flour mixture into the egg yolk mixture alternatively with the whipped egg whites. (Take care not to deflate the egg whites.) Pour the mixture into your prepared pan, smooth out the top, and bake for about 20 – 25 minutes until the cake pulls away from the sides of the pan, and the toothpick inserted into the center comes out clean. Let the cake cool in the pan for 5 minutes, and then transfer it onto a cooling rack and let it cool completely. Wash the springform pan and set it aside.
  6. While the cake is cooling, cook a simple lemon syrup: Bring the water with sugar to a boil, and mix in the lemon juice. Let cool. (The syrup can be made in advance and refrigerated; I used about half and reserved the rest for later).
  7. When the cake is cool, remove the dome from the top if any, and return the cake into the springform pan lined with clean sheet of parchment. Spoon the syrup over the cake to moisten it, and spread the cake with apricot preserves. Cover the cake with sliced bananas.
  8. Prepare the filing: Combine gelatin powder and water in a small bowl; let stand for 10 minutes to bloom. Mix yogurt and sour cream together until well combined and no lumps remain; add in sugar and vanilla, and combine. In a separate bowl, whip the cream until firm peaks form; carefully fold the whipped cream into the yogurt-sour cream mixture.
  9. Heat the gelatin mixture in a water bath until very hot and the gelatin dissolves, stirring constantly. Do not boil, or the filling won’t set. Add 3 tablespoons of the filling into the hot gelatin to temper it, and pour it back into the remaining filling. Mix well. Pour about half of the filling onto the cake in the pan, covering the bananas. Put into the refrigerator for couple of minutes to partially set the filling. Leave the remaining filling on the counter so it remains pourable.
  10. Cover the partially set filling with sliced strawberries, and pour the rest of the filling on top. (I had some filling left over.) Refrigerate for couple of hours (up to overnight) to set the filling completely.
  11. Decorate the cake with fresh fruit. Make the gelatin glaze: Combine gelatin with cold water, and set it aside to bloom. Add in the hot water, honey, and lemon juice, and whisk until the gelatin is completely dissolved and the mixture looks clear. Put the mixture into the fridge for couple of minutes, stirring occasionally. When the gelatin mixture has a consistency of raw egg whites, spoon it carefully over the fruit on the cake (I used a paintbrush). Let the gelatin set.
  12. Remove the cake from the springform pan, and place it onto a serving plate. Decorate the cake with additional whipped cream if desired and serve.

img-2016-09-04-6435

Cantaloupe – Peach Preserves and Boozy Fig Jam

I have a confession to make: I’m not a gardener. Plants and I simply don’t mesh. There are all these studies out there saying gardening is good for you, how digging in the dirt leads to a strong immune system and a better mental health… But alas, despite to being born to avid gardener parents, I was definitely endowed with a brown thumb… or two. My aunt, whose apartment looked like a jungle full of luscious green foliage plants, used to say that the secret is to talk to your plants. It was an interesting theory… but the more I thought about it, the less I was sure I was buying it. I mean, I talk to my kids, and have been doing so for years… prattling on and on about how to behave and what I thought they should be doing and why. In the end they pretty much always did what they wanted anyway. So if the offspring, flesh of my flesh and blood of my blood don’t listen, why should I believe some shrubs from the Home Depot would?!

But talking or not talking method aside, I’ve tried many things to overcome this shortcoming: I tried to buy hardy plants, supposedly able to withstand unintentional manhandling. I tried to water them more and water them less; give them attention, or give them space and let them do their thing… but “their thing” in my care always seemed to just be dying. Sometimes fast and sometimes slow, but eventually I always managed to kill them all. They say the first step to overcome anything is to embrace the truth, so I may just as well come out and say it like it is: Hi, I’m Daniela, and I am a prolific plant killer. I’ve come to terms with this; in fact, we all have. Instead of flowers, Mr. Photographer buys me chocolate, and if he does bring me a potted plant from time to time, we have an unspoken agreement it will be up to him to take care of it for me. I enjoy admiring its beauty from a safe distance, casting furtive glances at it from the other room, but won’t dare to come much closer.

I rather stick to doing what I’m good at, which is processing the fruit of edible plants somebody else managed not to do in. I enjoy walking through farmers markets on lazy Saturday mornings, looking at all the beautiful abundance Mother Nature decided to give us, touching and smelling it, and then bringing some of it home and transforming it into something else. And this weekend, we’re jamming, which is probably my most favorite way of succulent produce transformation. Jam making is easy, relatively fast, and I get to play and come up with new and unusual yummy combinations. Plus, my men like pancakes 🙂 Here is a glimpse of what I made: The first one is a peach and cantaloupe jam, which turned out the most beautiful sunny yellow color. It’s also a little runnier (probably thanks to the cantaloupe and its high water content), and therefore awesome to spread on crepes. The boozy fig one is the real winner though. Sweet and a little tart, with just a hint of cinnamon. I threw in some fresh lemon peel and divided the brandy in half – half was poured into the fruit right at the start and left to macerate, and the second half I added at the end of cooking (I didn’t want all that boozy goodness to evaporate!) We tried it right away on some grilled cheese sandwiches, and although it may seem like an odd combination, it was delish! If you decide to only try making one jam this year, this should be it!

img-2016-08-28-6404

Cantaloupe – Peach Preserves and Boozy Fig Jam

Cantaloupe – Peach Preserves

(makes about four ½ – pint jars)

  • 450 g (1 lb.) peeled and seeded cantaloupe, diced
  • 450 g (1 lb.) yellow peaches, stoned, peeled, and diced
  • 4 tablespoons fresh lemon juice
  • ½ cup (125 ml) fresh orange juice
  • 300 g (10.5 oz.) granulated sugar
  • ½ teaspoon ground anise
Method:
  1. Process the cantaloupe and peaches in a food processor or a blender. Pour the mixture into a deep saucepan.
  2. Add in the remaining ingredients, and bring the fruit to a boil. Cook, stirring almost constantly, for about 20 minutes, until the jam thickens to your liking. (For more info about how to know if the jam is ready, see this Mirabelle Ginger Jam post).
  3. Ladle the hot jam into clean ½ – pint glass jars, leaving about ¼ – inch space at the top. Remove any air bubbles. Wipe jar rims with clean damp cloth. Cover with hot lids; apply screw bands. Process the jars in a pot of boiling water for 15 minutes.
  4.  Remove the jars from the water and let them cool upside down. Store the jam in a dark, cool place for up to a year.

img-2016-08-28-6410

Boozy Fig Jam

(adapted from http://www.epicurious.com; makes about six ½ – pint jars)

  • 2 kg (4 lbs.) fresh purple figs, divided
  • zest from 1 organic lemon
  • 10 tablespoons (about ½ cup) fresh lemon juice (to taste)
  • 4 cups (about 800 g, 28 oz.) granulated sugar
  • ½ teaspoon coarse kosher salt
  • 1 teaspoon ground cinnamon
  • 3/4 cup (about 175 ml) brandy or cognac
Method:
  1. Process half of the cleaned and stemmed figs in a blender. Cut the remaining figs into ½ – inch (1 cm) pieces. Transfer all the figs into a deep big saucepan. Add in the sugar, lemon juice & zest, cinnamon & salt, and half of the brandy or cognac. Mix together, cover, and let stand at room temp for 1 hour.
  2. Bring the mixture to a boil, and cook, stirring often, for about 30 – 35 minutes, until the jam thickens, breaking up the large fig pieces into smaller bits. Add the remaining brandy or cognac at the end. Remove from heat.
  3. Ladle the hot jam into clean ½ – pint glass jars, leaving ¼ – inch space at the top of the jars. Remove any air bubbles and wipe the rims with a clean damp cloth. Cover with hot lids; apply screw bands.
  4. Process in a pot of boiling water for 15 minutes. Cool jars completely turning them upside down. Store in a cool dark place for up to a year.


(Raw) Blueberry and Fig Torte

We’re apparently getting slammed by a heat wave. The temperatures are climbing into the 90’s during the day and we’re being warned about excessive heat and the need to take precautions everywhere we turn. It amuses me the same way as when we’re blessed with a random sprinkling of snow in December and the moment it happens they close schools and life in general comes to a halting stop until the last trace of the white intruder disappears from the roads. The high temperature of 92/34 is hardly a looming catastrophe and I don’t think we should treat is as something that it isn’t. C’mon, folks, slather on some sunscreen and be grateful for an extra dose of vitamin D – we have to gulp down pills for it the rest of the year around here!

Personally, I’m soaking up every bit of sunshine I can get these last couple of days. My middle name must be Lizard… I feel like I’m finally not shivering and my hands and feet are not deathly cold as they usually are. Plus I get to air out all my sundresses and play with sunhats which have become my latest obsession. (I know not everybody must be a hat person, but if you simply haven’t had a chance to play with hats yet, you should absolutely give them a try: I’m convinced a hat can take just about any outfit from ordinary to something special and fun!)

But let’s put our chef’s hat on for now, shall we? It is hot out there, yes, but that doesn’t mean we have to forego desert, nor that we should! Many people seek refuge in ice cream on summer days, but I have to confess I’m one of those weirdos that dislike ice cream (too cold!). Maybe I’m the only one in the whole wide world, but on the slim chance you’re with me, I have a desert for you – and one you won’t have turn your oven on for, no less!

I love berries – strawberries, raspberries, gooseberries – anything ending with an -erry pretty much. This weekend’s treat showcases blueberries – plump, juicy, and sweet little gems that prove that the best things come in small packages (as someone who’s barely 5’3” on a good day, I’m absolutely positive about that). Blueberries are nutritional powerhouses – they aid digestion, lower heart disease risk, improve vision, act as natural anti-depressants, they even have the ability to reduce belly fat. The last bit won’t apply if you mix them with a cup of coconut cream as we’ll do here I guess, but when you’ll taste the wonderfully rich and creamy filling, you won’t care about that – at least until you devour every last bite on your plate 😉 But blueberries are just the beginning; for this desert they joined their forces with another awesome member of the purple fruit family: figs. Although I haven’t met fruit I wouldn’t like yet, figs are definitely up there on my list of great summery treats. I think they’re one of God’s best creations – fig leaves can even double up as underwear as referenced by the Bible, which might come in handy on days when we’re drowning in dirty laundry…, and the fruit is simply to die for. If figs aren’t plump, juicy, and sweet, I don’t know what is!

As I said, don’t bother turning on your oven, and don’t plan on spending hours in the kitchen, either: If you remember to soak your dates and cashews a couple hours in advance, this torte comes together in a snap. It’s best to make it a day before you want to serve it, but after it’s assembled, you can just stick it into the freezer and forget about it. Take it out ten minutes before serving, top it with handful of blueberries, some fresh figs and dry coconut shavings – and voilà! Rich and creamy purple haze for a hot summer day!

img-2016-08-20-6395

(Raw) Blueberry and Fig Torte

(recipe adapted from www.coconutmagic.com)

 Crust:
  • ½ cup shelled raw pistachios
  • ¼ cup raw hazelnuts
  • 5 – 6 dates, soaked in hot water for at least 15 minutes
  • ½ teaspoon cinnamon
  • ¼ teaspoon nutmeg
  • pinch salt
Filling:
  • ¾ cup raw cashews, soaked for 2 hours in water or coconut milk
  • ¾ cup canned coconut cream (not milk)
  • 3 tablespoons coconut nectar (I subbed maple syrup)
  • 2 tablespoons coconut oil
  • 1 tablespoon chia seeds
  • ½ teaspoon vanilla
  • pinch salt
  • 1/3 cup fresh or frozen blueberries
  • 2 fresh purple figs
  • pinch of purple coloring, such as TruColor Natural Food Color Powder (optional)

+ fresh berries, figs, and dried coconut shavings for decoration

img-2016-08-20-6397

Method:
  1. For the base, line a 7-inch (18 cm) springform pan with parchment; lightly grease the sides if you wish.
  2. Process all the crust ingredients listed in the food processor until they form a sticky paste. Press the dough into the bottom of the pan. Refrigerate or freeze while you make the filling.
  3. For the filling, blend all of the ingredients except food coloring in a high power blender until smooth. Transfer the filling into a bowl and gradually add the food coloring if you wish (The color of the filling will depend on the blueberries used; the smaller/darker ones will usually give you darker and more pronounced shade of purple. My filling looked kind of grayish, so I ended up using a bit of coloring, even though I usually try to avoid it in my baking.) Pour the filling onto the prepared crust, smooth out the top, and place the torte in the freezer for at least 5 hours (overnight is better).
  4. To serve, remove the torte from the springform pan onto a serving plate about 10 minutes before serving, and decorate with fresh berries and figs and dried coconut flakes.
  5. Dig in 🙂 Store the leftover slices in the freezer.

Gluten-free Brie en Croûte

They say that secret to a happy marriage is a deaf husband and a blind wife. Mr. Photographer has suffered from selective deafness for years, just like any other man on this planet… and come to think of it, suffer is probably a bit strong of a word to use in this context – he’s perfectly content living with this condition; it’s me and millions of other wives around the world that suffer! So the male deafness part has been taken care of, now we just needed to deal with the sight in his wife to achieve that promised marital bliss. You see, I see everything. Everywhere. And what’s more, feel the need to comment on everything I see, which results in a near constant stream of words coming out of my mouth. Did you…? Have you had a chance to…? Can you do it now? I mean, I’d gladly see less; when I’m home, I actually quite often take off my glasses for just this purpose – as long as I don’t see the dust bunnies, cluttered desk, or unkempt yard, I’m fine. If I see, I talk. And delegate. I mean, I’d gladly talk less if it didn’t feel like our household and life in general would fall apart without all my monitoring questions and reminders! Men call it N-agging. We call it N-ecessity.

I’m not sure if God intended to make me blind to match my selectively deaf husband to let us experience a spousal happiness together, and simply made a mistake and confused the body parts he planned to work on. (Hey, even experts make mistakes sometimes!) It’s also possible he knew exactly what he was doing and wanted to help me not to feel like a broken record for once, or help Mr. Photographer and his sons to catch a break from the (necessary) nagging. Whatever the reason… instead of poking my eye out, he just took my voice away. He was thoroughly thorough however – it wasn’t like I just suddenly couldn’t sing in the shower or raise my voice to get the attention of a headphones wearing teen. No. I woke up, opened my mouth, and instead of good morning out came nothing. Not even a peep.

And it stayed that way for three whole days.

It was funny. My men were hollering their questions at me from upstairs, repeating them two or three times before they remembered “Oh, she lost her voice!” and realized they would have to find me if the answer was really so important. It brought us closer – quite literally, because to hear me at all they needed to be glued to me, reading from my lips. (How’s that for the undivided attention and visual contact we ladies crave so much? Score!) I think we all enjoyed our little break, each for a different reason, but felt relieved when the voice ever so slowly started coming back. I’m still nowhere close to my usual yelling ability level, but I’m getting there! 🙂

Luckily, the non-talking stint didn’t interfere with my baking, unlike the loss of vision would, and for that I’m super grateful! And since I couldn’t tell Mr. Photographer I loved him, I decided to step into the kitchen to let him know that 🙂 He’s been talking nostalgically about the baked brie appetizer he used to love in his long gone gluten-full days. One of these days I plan to attempt gluten-free puff pastry… but for now I went with something simpler – a buttery pastry dough enriched with sour cream. Adding sour cream to any pastry (gluten – free or gluten – full) is always a great idea, as it makes the pastry wonderfully tender. The process is relatively easy and quick; the only thing to remember when making the dough is to keep the butter very cold. When the dough is ready, the whole thing comes together in a snap, and after 20 minutes out of the oven emerges a gooey goodness enclosed in golden pastry crust. As we’re scooping up the melty cheese with crackers and sipping wine, I’m here to tell you that achieving marital bliss is obviously easier than one would think – no tinkering with sight or hearing of the involved parties necessary!

img-2016-06-11-3563

Gluten-free Brie en Croûte

(adapted from http://www.glutenfreeonashoestring.com)

Sour Cream Pastry Dough:
  • 1 ½ cups (210 g) good quality gluten-free flour mix
  • ½ teaspoon salt
  • ¼ teaspoon baking powder
  • ¾ teaspoon xanthan gum (omit if your mix contains it already)
  • 6 tablespoons (84 g) very cold, unsalted butter; diced
  • ½ cup (120 g) full-fat sour cream
  • icy cold water, only if needed

+ 8 oz. (225 g) Brie wheel, about 4 inches (10 cm) in diameter
optional: preserves, chopped nuts, honey, dried apricots, etc.
1 egg yolk mixed with little water – for egg wash

img-2016-06-11-3559

Method:
  1. Place the flour, salt, xanthan gum, and baking powder in a bowl of your food processor. Add in the cold diced butter and pulse to coat the butter with flour. Add the sour cream and pulse again, just until the dough comes together somewhat (it will look shaggy). If it’s too crumbly, add in some icy water by the teaspoon – only if necessary. Gather the dough into a ball, wrap in plastic, and chill for at least 30 minutes before proceeding.
  2. On a work surface covered with parchment, roll out the dough into a rectangle roughly 1 inch (2.5 cm) thick. Fold the dough over itself into thirds as if folding a letter. Chill for 10 minutes.
  3. Turn the dough and roll it out again (sprinkle the parchment paper with some flour, if the dough begins to stick, but it’s chilled, so it shouldn’t stick much). Fold it into thirds again, and return it to the fridge for 10 minutes.
  4. Line a baking sheet with parchment paper and set aside. Roll/fold the dough one last time, and divide it into two equal parts.
  5. Roll out one half into a circle about 3/8 inch thick and 8-inch  (20 cm) in diameter. Place the circle onto the lined baking sheet and chill while rolling out the second half of the dough into circle. (The circles don’t have to be perfect; you’ll be trimming them later.) Chill the second circle as well.
  6. With a sharp knife, cut off the top rind of the cheese wheel. Place the cheese onto the circle on the baking sheet. Brush the edges of the dough around the cheese with the egg wash.
  7. Cover the cheese with the second rolled out circle of dough, pressing around the cheese to enclose it. Trim the dough if necessary. Brush the entire pastry with egg wash again. Re-roll the scraps of dough and cut out decorations to place on top of the pastry or make a couple of crackers to bake later.
  8. Chill the pastry for about 30 minutes. Preheat the oven to 375 °F (190 °C).
  9. Give the pastry another coat of egg wash if desired. Bake for about 30 minutes until nice golden brown. Let cool for about 30 minutes before serving with crackers, sliced apples, and wine.
  10. (You can make the pastry in advance up to point 7; omit the egg wash and freeze, tightly wrapped. Let the pastry come to room temp before baking, give it a coat of egg wash, and bake.)
Note:

Variation: Spread the cheese with preserves and sprinkle some nuts on top before enclosing it in the pastry. Alternatively, you can drizzle the cheese with honey and sprinkle it with dried fruit.

If making crackers from the dough scraps, brush them with egg wash, sprinkle with coarse salt and/or seeds, and bake at 375 °F (190 °C) for about 10 – 12 minutes.


Homemade KIND Cereal Bars

The game of life can be tough. From the moment we open our eyes in the morning till we drop to bed at night we’re constantly on the go. We run out of the door already late, because dear offspring couldn’t find his algebra notebook. Half asleep, we turn to Starbucks to get some shot in the arm, make appointment for a chipped tooth while waiting in the drive-through line, and then burn our tongue with hot pick me up while parking at the office. Breakfast is hasty spoonfuls of yogurt gulped down at a red light. Lunch? Cereal bar and a banana around three pm while answering emails. And pretty soon a dreaded stop-and-go commute from work back home, pondering how to get dinner on the table, take care of homework, laundry, and dishes, and still manage to go to bed at a reasonable hour. Only to do it all over again the next morning.

I don’t work well when I’m hungry. My men could tell you stories about this trait of mine – about the unnecessary arguments, yell fests, and even guilty tears related to those darn sugar drops. It usually happens when I’m too busy, and it starts innocently enough: I just might start to feel a little cranky at first, my answers become tiny bit snappier… but when I don’t recognize I’m overdue for a feed and don’t remedy the situation quickly enough, it all goes downhill pretty fast. I know I’m not the only one suffering from this; after all, there is even this new term “hangry”, labeling that miserable state when hunger and anger intersect… but I could definitely be a model for it.

That was at least partially why I tried my hand at these bars. I try to keep some snack food and water with me at all times to prevent hunger induced relational disasters, but cereal bars carried around in your purse dry out pretty quickly I found, not to mention they’re not exactly easy on the budget! It was my first experiment with homemade cereal bars ever, but it certainly won’t be the last. I like that I can control the amount of sugar, and vary the ingredients according to what I have on hand. They’re extremely easy and fast to make and don’t even require turning your oven on!

Please be kind to yourself and eat when you need to. No matter how busy you are, it’s still much easier to find time to eat, than have to apologize over and over for you’ve said and done when you were hungry 🙂

img-2016-05-19-2733

Homemade KIND Cereal Bars

(adapted from http://www.eat-yourself-skinny.com)

Ingredients:
  • ½ cup unsalted roasted almonds, whole
  • ½ cup  unsalted roasted peanuts, whole
  • ½ cup roasted walnuts/pecans, chopped
  • 1/3 cup puffed rice cereal
  • 1 tablespoon flaxseed meal
  • ¼ cup brown rice syrup (I used maple syrup instead)
  • 2 tablespoons honey
  • ½ teaspoon vanilla
  • ½ teaspoon sea salt
  • ½ cup dark chocolate, roughly chopped

img-2016-05-19-2727

Method:
  1. Line an 8-inch square springform pan with parchment paper; set aside.
  2. To make the bars, mix nuts, flaxseed, an puffed rice in a greased bowl; set aside.
  3. In a small saucepan, mix together brown rice syrup (maple syrup), honey, vanilla, and salt. Bring to a boil, and cook for about 2 minutes, whisking constantly.
  4. Pour the hot mixture over the ingredients in your bowl and stir to combine. Transfer the mixture into the pan and press evenly, making sure there are no gaps. (The recipe says there is enough for a 8-inch pan, but I didn’t find this to be true – I was able to only fill about 2/3 of the pan if I wanted the bars to be high enough).
  5. Place a sheet of parchment on top, and press the mixture firmly. Set the pan aside and let the mixture cool for about 20 minutes.
  6. Remove the rim of the pan, transfer the cereal block onto a cutting board, and cut it into uniform pieces with a sharp knife. (Serrated knife worked best for me.) Let the bars cool completely.
  7. For the chocolate drizzle, melt the chocolate over a water bath and drizzle over the bars. Keep the remaining bars in the refrigerator or freezer to keep them fresh.


Chocolate Hazelnut Mousse Cake

“Oh, did you know moose are some of the animals most likely to escape from cages or zoos? Their snouts are incredibly flexible and capable – almost as good instruments as an elephant’s trunk, perfectly capable of manipulating doorknobs!” informed me my son, lured into the kitchen by the smell of toasted hazelnuts, when I told him what I was making. I have no clue how he jumped so quickly from the idea of airy sweet pudding to the largest member of the deer family, but now that I know, I’m sure I’ll be peeking over my shoulder fully expecting some runaway moose skewer me onto its antlers whenever I’ll find myself in a zoo. Because I can’t seem to remember that I need to buy toilet paper at the store, nor that I shouldn’t still be stuffing my face after 6 p.m., but a piece of useless information such as this will undoubtedly stick with me forever.

And do you know what else is as good an escapist as moose? Mousse! I can’t keep it in the house. It just seems to disappear, usually in conjunction with two slightly guilty (but satisfied) teenagers. It catches a lift on spoons, cowers in bowls, or sneaks into cakes in lieu of a filling, gradually leaving nothing but a contented silence behind. This, of course is at least partially my fault – while the light whipped crème is a delight all in itself, I cannot resist taking it one step further and merging it with layers of moist rum-scented chocolate cake into something entirely new and delicious. Throw in some toasted hazelnuts, and mousse finds a new contender for kitchen escape artistry!

img-2016-05-08-2712


Chocolate Hazelnut Mousse Cake

(adapted from Nick Malgieri’s: Chocolate)

Cake:
  • 4 eggs, room temperature, separated
  • ¾ cup sugar, divided
  • pinch salt
  • ¼ teaspoon cream of tartar
  • 1 cup ground hazelnuts
  • ½ cup cake flour (I used Bob’s Red Mill 1 for 1 all-purpose gluten-free flour mix)
  • 3 tablespoons dark cocoa powder
  • 1 teaspoon baking powder
Rum syrup:
  • 1/3 cup each sugar, water, and rum
Chocolate Hazelnut Mousse:
  • 16 oz. (454 g) good quality bittersweet chocolate, chopped
  • 1 ¼ cup (310 ml) heavy cream
  • 1 stick (8 tablespoons, 4 oz., 114 g) unsalted butter, softened
  • 3 tablespoons rum
  • 4 egg whites, room temperature
  • 2/3 cup sugar
  • 1 cup hazelnuts, toasted, skinned, and roughly chopped (see Note)

img-2016-05-08-2705

Method:
  1. To make the cake, butter a 10 inch (25 cm) springform pan and line the bottom with parchment paper. Preheat the oven to 350 °F (175 °C).
  2. Beat the egg yolks with half of the sugar until thick and light yellow in color. In a separate bowl, whip the egg whites with salt and cream of tartar until opaque, then gradually add in the remaining sugar and continue whipping until stiff peaks form. Fold yolks into whites, and then add in the ground nuts. Combine flour, cocoa, and baking powder, sift the mixture over the batter, and fold it in. Pour batter into the springform pan, and bake for about 30 minutes, until the cake springs back, and the cake tester comes out clean. Unmold and let cool.
  3. For the rum syrup, boil water with sugar. Cool and pour in the rum. Set aside.
  4. For the mousse filling, place the chocolate into a glass bowl. Bring the cream to a boil, and pour it over the chocolate. Whisk until smooth. Let the chocolate mixture cool to room temp. Beat the softened butter until fluffy, then add in the cooled chocolate and rum. Heat egg whites and sugar, whisking constantly, until the sugar dissolves and the mixture is hot, and then whip the egg whites using an electric mixer until cooled. Fold the egg whites into the chocolate, and add in the chopped hazelnuts.
  5. To assemble, slice cake into three layers. Place one layer back into the washed springform pan and moisten it with the syrup. Spread with 1/3 of the mousse. Continue layering moistened cake layers and filling, ending with the mousse. Place the cake into the fridge to set the mousse.
  6. Unmold the cake onto a serving plate, decorate with hazelnuts and/or shaved chocolate, and serve.
Note:

Best way to skin the hazelnuts is to cook them in some water with baking soda for couple of minutes, until the water turns black from the skins. The skins should then slip off easily (much easier method than rubbing the toasted hazelnuts in a dish towel!)

I made the cake in an 8-inch (20 cm) springform pan, and sliced it just in two layers. I had quite a lot of filling leftover, but I wanted the cake to be higher, and it worked quite well this way.

  • img-2016-05-08-2717.jpg


(Raw) Chocolate Orange Torte

Chances are you’ve heard about the Buy nothing project, by now a worldwide movement based on a gift economy. Local groups are sprouting up all over, connecting people living in the same area. The project was born out of the idea that one man’s clutter can be another man’s treasure, but it evolved into much more than that. Yes, you receive free stuff in the process (and declutter your home of the things you no longer want or need), but more importantly, it builds a sense of community, and closer relationships between neighbors who otherwise might not get to know each other past the occasional wave hello when they’re pulling out of their driveway rushing to the morning meeting. I love the philosophy behind the Buy nothing – reduce, reuse, rethink – and am grateful it put me in touch with like-minded folks I wouldn’t even know are out there. One of my most treasured buy nothing gems were sourdough bread starter and grains to make kefir from, both of which I have been trying to hunt down forever. As it turned out, a nice lady living just a couple of blocks from me had both, and was nice enough to share not just the products, but also her time in explaining how it all works and what to do and not do to keep the delicate cultures alive and thriving, which I appreciated even more!

And last week I was generously gifted another thing that made me happy – a Blender girl gluten-free vegan cookbook. I am a longtime green smoothie addict and have some kind of green drink for breakfast pretty much every day, but despite its name the cookbook isn’t limited to blended drinkable concoctions. There are soups, spreads, drinks, and even desserts in there. The pictures look amazing – I’d eat anything and everything from that book, and plan to try quite a few recipes from there.

And we started with this chocolate orange torte. Raw desserts seem to be all the rave lately, and for a very good reason: They’re mighty tasty, free from artificial sugars, flour, and butter, and they’re also pretty easy and fast to make. This wonderful torte was no exception: All I had to do was pretty much just to blend, grind, mix, and pour, and after giving the cake the appropriate time to firm up in the freezer I was rewarded with a rich, chocolatey finger-licking awesome goodness. It’s not a treat for the calorie-conscious, that’s for sure, but hey, coconut oil is good for you, and all those nuts supply omega fats… and protein… all the things your body needs. Shall we say dessert with benefits? 🙂 How rawsome is that?!

img-2016-04-24-2645

Raw Chocolate Orange Torte

(adapted from the Tess Masters’ Blender Girl Cookbook)

 Crust:
  • 1 cup (160 g) whole raw almonds
  • ½ cup (80 g) firmly packed chopped pitted dates
  • ¼ cup (18 g) cacao powder, see Note
Filling:
  • 1 cup (240 ml) liquid coconut oil
  • 1 cup (240 ml) freshly squeezed orange juice
  • ¾ cup (180 ml) raw agave nectar, see Note
  • ½ cup (35 g) raw cacao powder
  • 3 cups (420 g) raw unsalted cashews, soaked for 2 hours and drained
  • ¼ teaspoon orange extract
  • 1 teaspoon grated orange zest
  • pinch sea salt

+ shaved chocolate and orange – for decoration (optional)

img-2016-04-24-2650

Method:
  1. To make the crust, grease a 7-inch (18 cm) springform pan with coconut oil. Process almonds, dates, and cacao powder in a food processor. If the dough doesn’t hold together, add some more dates. Press the dough into the bottom of the pan and refrigerate.
  2. To make the filling, put all the ingredients into your blender in the order listed and blend until smooth. You’ll have to stop the blender from time to time and scrape down the sides. Pour the filling into the crust, cover the pan, and freeze the torte for 8 hours.
  3. To serve, transfer the tote from the freezer to the fridge at least 1 1/2 hours before serving. Let the torte defrost in the refrigerator for 30 minutes, remove the sides of the pan and cut the torte into slices with a sharp knife. Keeping the slices together, return the cake into the refrigerator and continue defrosting for at least an hour before serving. (The remaining cake needs to be stored in the refrigerator due to the high amount of coconut oil. Take out of the fridge when ready to serve.)
Note:

Even though the cake won’t be technically raw anymore, you can sub raw cacao powder for unsweetened cocoa powder, and agave nectar for maple syrup. I also didn’t have orange extract, and used Grand Marnier in its place. As far as I can tell, it didn’t hurt anything 🙂