Spooky Coconut Panna Cotta with Bloody Good Raspberry Sauce

It’s that time of year again: Toothy jack-o-lanterns, black cats, and scary witches are jumping at us from every corner. It’s a time when you can feed the neighbor kids all kinds of sweet cr*p, so they think you’re the coolest lady in the neighborhood (just don’t forget to promptly send them back home, so that when the sugar high hits and they’ll inevitably go crazy, you won’t be the one that has to deal with them). The only time when you don’t have to worry about having bad hair day and dark circles or puffy eyes, because being scary is actually a requirement. Actually, this time of year you could maybe even get away with killing that horrible coworker that has been annoying the heck out of you for ages: you’d just put him or her in a squeaky old chair on your porch, and no one would probably notice (not for the first week, anyway)!

Some people love Halloween, while others positively hate it and can’t wait for it to be over. When I first came here, I thought it was the weirdest holiday ever. It took me five years to accept it, and another five to get to like it. Today I see it as an opportunity to play, and that is always a good thing in my book. We have to play in life… otherwise it all gets too serious. And it doesn’t really matter if you dress up or not (my teenagers would probably say I don’t need to because I’m a witch all year anyway), or if you decide to dress up your porch instead and make your home the scariest one on the block. The important thing is that you take some time away from all the busyness that’s normally doing its best to suffocate us and do something – anything – that makes you feel like a kid again.

And this is how we played at our house this week! I found this recipe sometime last year and put it aside just so I could make it this Halloween. Panna cotta is a traditional Italian custard, made from sweetened cream thickened with some gelatin. You can flavor it any way you want – mine is made with half cream/half coconut milk and infused with toasted coconut. I enjoy working with gelatin, knew the boys would appreciate some good old creepy food, and I even managed to get Mr. Photographer to step into the kitchen and join me in some gross-out fun 🙂

So here you go! Don’t you want to cut yourself a piece of that squishy bulgy eyeball? Play, eat, drink, and be scary.  Happy Halloween!

img-2015-10-25-0476

Spooky Coconut Panna Cotta with Bloody Good Raspberry Sauce

(adapted from http://kitchentablescraps.com; makes 6 servings)

Panna cotta:
  • 1/3 cup unsweetened shredded coconut
  • ¼ cup dark raisins
  • 1 ½ teaspoon unflavored powdered gelatin (I used Knox brand)
  • 1 tablespoon Malibu (coconut rum)
  • 1 cup full-fat canned coconut milk
  • 1 cup whipping cream
  • ¼ cup granulated sugar
  • ½ teaspoon coconut extract (optional)
  • 3 kiwis
Raspberry sauce:
  • 1 cup frozen raspberries
  • 1 teaspoon raspberry liqueur (optional)
  • ½ cup granulated sugar (or to taste)
  • 2 teaspoons fresh lemon juice
Lenses:
  • 1 ½ teaspoon unflavored powdered gelatin
  • 1 tablespoon granulated sugar
  • ½ cup water
Equipment:
  • 6 semi-cylindrical molds or bowls (I used silicone baking mold with 6 cavities), about ½ cup each
  • cooking spray
  • melon baller
  • muffin pan with foil liners
  • small cookie cutters (1 1/2 inch, 3.8 cm in diameter)

img-2015-10-25-0473

Method:
  1. First, toast the coconut: Place the coconut in a non-stick pan, and stir it constantly over a medium heat until very lightly brown and fragrant, about 2 – 3 minutes. Set aside.
  2. Soak the raisins in warm water to soften them; then drain and set aside.
  3. In a small saucepan, combine coconut milk with cream and sugar; heat until hot, but not boiling. Remove from the heat. Add the toasted coconut and coconut extract; let stand for at least 20 minutes to infuse the milk liquid with coconut flavor.
  4. Combine gelatin with 1 tablespoon Malibu rum; let stand for about 10 minutes to “bloom”.
  5. Meanwhile, prepare the molds and the kiwis: Spray the molds with cooking spray; wipe away the excess. Peel the fruit. Cut off the end and cut each kiwi in half. Place the kiwi into the mold to measure and cut it so that it is the exact height as your mold or bowl. Take the cookie cutter and cut the kiwi into a perfect cylinder. With a melon baller scoop out the center of the kiwi cylinder where you want the pupil to be. Put the scooped out half cylinder back into the kiwi for now. Invert the kiwi into the molds so that the scooped out end is facing down.
  6. Strain the toasted coconut flakes out of the milk liquid. Dissolve the bloomed gelatin in a warm liquid and then transfer the mixture into a measuring cup for easier pouring. Carefully pour the coconut cream around the kiwi into each mold until full. Move the molds into the refrigerator and chill for at least 4 hours. (I chilled overnight.)
  7. Make the lenses: Bloom the gelatin in 1 tablespoon water for 10 minutes. Line muffin cups with paper liners. Heat up the 1/2 cup water with sugar; do not boil. Dissolve the bloomed gelatin in the water and pour a little bit into each muffin liner. Chill the gelatin for at least 30 minutes until set. When the gelatin has set, unmold it carefully and cut out 1.5 inch (3.8 cm) circles which will become the lenses for your kiwi irises. Chill until needed.
  8. Assembling the eyeballs: When the panna cotta has set, get ready to unmold it by placing a sheet of wax paper onto a cutting board. Carefully unmold each piece onto the paper and clean any bits of white panna cotta from the kiwis. Take out the small piece of kiwi from the center of the iris and fill the cavity with soaked raisins. Place the lens over each kiwi iris. The edges of the gelatin lens will be a little rough; take a hot knife and carefully melt the gelatin around the edges to make it smoother. Refrigerate the eyeballs while you make the sauce.
  9. Prepare the raspberry sauce: In a small saucepan, combine raspberries with sugar; heat the mixture to break up the fruit. Add the liqueur if using, and strain the mixture to get rid of the seeds.
  10. Spoon the raspberry sauce onto a platter, sit the panna cotta eyeball on top and serve.

Note:

I have a silicone baking pan with 6 half-sphere cavities, and used it for both the panna cotta eyeballs and the lenses. Removing the panna cotta was a little tricky; so I inverted the pan on the cutting board lined with wax paper and used a hair dryer (very carefully, for just 2 – 3 seconds) to get the dessert out. Removing the lenses was very easy; they slipped right out without any trouble.

Apple Cheese Galette

Of all of the seasons I love Summer the most, but Fall is a close second. They say Autumn is the year’s last smile… before life comes full circle and everything begins anew in the Spring. We’re in the middle of gorgeous fall around here and I love all about it: The colorful leaves and warm drinks, not to mention soft sweaters and tall boots. Thankfully,  they haven’t gotten the memo that they should’ve started pouring down by now and not stop for the next five months up there yet (shhh, please don’t tell them… just a little while more!) The mornings might be crisp, but later in the day it still warms up enough so that we can enjoy all the beauty around.

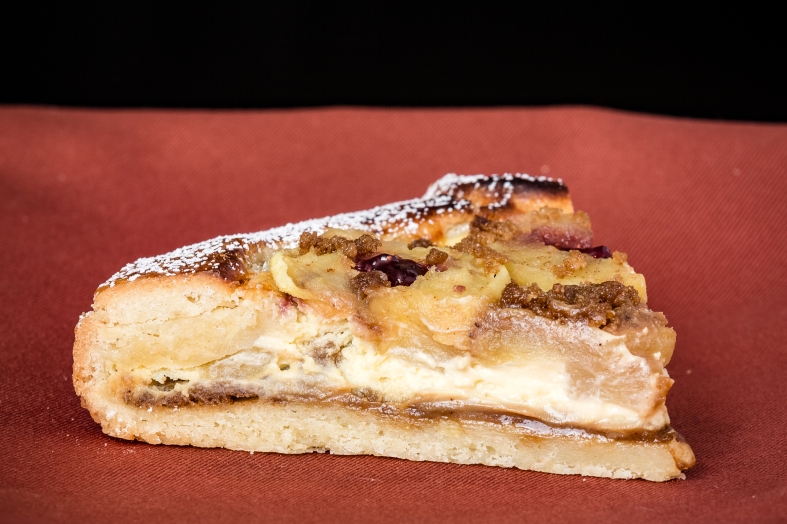
Fall fills me with nostalgia, and as usual, I deal with it by firing up the oven and filling the air with all the wonderful aromas this time of year has to offer. Today it’s apples, scented with gingerbread and cinnamon. I paired them with sweet cheese, and created a simple but very flavorful galette. Not much to write about it: galette is a free-form crusty cake with various sweet or savory fillings, and to me, it’s a very laid back type of dessert that can be tailored to whatever fruit you have on hand. I chose apples because they’re such a typical fall treat for us to enjoy, but I imagine pears or plums would work just as well; the key is to vary the amount of sugar and cornstarch depending on the fruit used. The dough is simply folded over the filling, creating a wonderfully crispy crust, while allowing the fruit to shine in all its beauty. Galette is also much easier and quicker to make than its somewhat temperamental and high maintenance relative pie – thus giving you more time to  curl up by the fire with a book, or go for a walk on one of the last sunny afternoons, and still come home to a great dessert.

Put on a thick scarf and go play in the crisp leaves, and then drive out the chill from your fingers and cheeks with a warm galette. Who says you can’t have it all? With just a little planning you absolutely can!

img-2015-10-17-0457

Apple Cheese Galette

(inspired by Nejlepší recepty 3/2015)

Pastry Dough:
  • 250 g (9 oz.) unbleached all-purpose flour
  • ½ teaspoon baking powder
  • 180 g (6 oz.) cold unsalted butter, cubed
  • pinch salt
  • 80 g (3 oz.) powdered sugar
Filling:
  • 80 g (3 oz.) ground gingerbread cookies
  • 1 egg, separated
  • 250 g (9 oz.) soft white cheese, cream cheese, or quark
  • 100 g (3.5 oz.) sour cream
  • 6 tablespoons sugar, divided
  • 2 – 3 tablespoons vanilla “cook and serve” pudding powder
  • ½ teaspoon fresh lemon zest
  • 2 – 3 apples, peeled, cored, and cut into rings
  • 2 tablespoons piquant jam (raspberry, cranberry)
  • 2 tablespoons spiced rum
  • pinch cinnamon
Gingerbread Streusel:
  • 2 tablespoons sugar
  • 80 g (3 oz.) ground gingerbread cookies
  • 2 tablespoons cold unsalted butter

+ 1 egg, beaten, for egg wash

img-2015-10-18-0459

Method:
  1. First, make the dough: Place flour, baking powder, salt, sugar, and cold cubed butter into the bowl of your food processor; pulse until the mixture resembles peas. Add in the egg and pulse until the dough comes together in a ball. Wrap the dough and chill it for at least an hour before proceeding.
  2. Meanwhile, cook the apple rings in water with 2 tablespoons sugar for about 5 minutes until soft. Drain the apples and let them cool.
  3. Prepare the cheese filling: Place cheese, 4 tablespoons sugar, egg yolk, vanilla pudding powder, and lemon zest into the bowl of your food processor fitted with an s-blade. Mix to combine. Whip the egg white until firm peaks form, and mix in carefully with a spatula into the cheese mixture to lighten it.
  4. Make the Streusel Topping: Combine all the ingredients with your fingers; chill until needed.
  5. Remove the cold pastry dough from the fridge; roll it out on a lightly floured work surface into a circle about 3 cm (a little over an inch) bigger than a 23 cm (9 inch) round springform pan. Line the springform pan with parchment paper, and butter and flour the sides. Preheat the oven to 350 °F  (180 °C).
  6. Fit the pastry into the pan, pressing the overhang up the sides for now. Sprinkle the bottom of the pastry with 80 g (3 oz.) ground gingerbread crumbs and cover them completely with the cheese filling. Arrange the cooled apple slices onto the cheese.
  7. Mix jam, rum, and cinnamon. With a teaspoon, place a tiny bit of the jam mixture into the apple slices, and sprinkle the entire galette with the gingerbread streusel topping. Gently fold the overhang pastry over the fruit, pleating as you go along. Brush the edges with the egg wash.
  8. Bake the galette for about 40 – 45 minutes until golden brown. If the edges brown too quickly, cover them with aluminum foil. Cool the galette for at least 30 minutes on a wire rack. Serve warm or at a room temperature.

Slovak Potato Dumplings with Plums and Marzipan

Life is full of rules: Eat five servings of fruits and vegetables a day. Don’t mix stripes and polka dots. Exercise regularly. Don’t wear socks in sandals. Never lick a steak knife. Most of the rules are there for a very good reason (the sock and sandal one especially!); but sometimes you just want to forget they exist and do things a little differently. I think that’s how the concept of breakfast for dinner came to be  – to give the responsible folk an opportunity to shake things up and bend the rules a little. Depart from the usual boring chicken and pasta and have a pancake or two instead.  Indulge. Just a bit.

Well, Slovak people took it one step further: Why  have  breakfast for dinner, when you can go straight for dessert?! Yep, you heard me. In Slovakia, you can legitimately eat dessert for dinner, and no one is going to bat an eye, much less to scold you for not eating your veggies. It’s freaking sugar addict paradise over there, I’m telling you.

To be honest, these dumplings definitely aren’t the recipe to make when you’re in a pinch. Boiling the potatoes, pitting the fruit, and rolling the dumplings does take some time.  But the good news is they freeze really well, and since your counters are already covered in flour and there is sticky potato dough stuck behind your fingernails, you might just as well make double batch. Or if you’re crazy kitchen maniac with slightly masochistic  tendencies like me, you can open an entire production line and make sixty dumplings at once when plums are in season. And when you’re done and the dumplings are neatly stacked in Ziploc baggies in the freezer, you can pat yourself on the back and enjoy a little Martha Stewart moment: Well done, Mother, keeper of the hearth and home, well done! And then… I don’t know… about a month later, on a day when you really-truly don’t have time to squeeze cooking in,  you open the freezer and find out, astonished, that the sixty dumplings are gone. Such is the life with teenagers. (Note to self: Next time, aim for a hundred.)

Now, when I said dessert, I didn’t mean some elaborate high end kind. These dumplings are quite simple and rustic. I think of them as cousins of Italian gnocchi, just bigger and sweet. The plums enclosed in a soft potato dough are wonderfully juicy,  and the marzipan that hides in each of them cuts down the tartness and makes the humble dumpling just a little more sophisticated. And the melted butter and generous dusting of ground poppy seeds/walnuts and powdered sugar on top? What can I say – go big or go home, right?! We Slovaks sure know how to indulge. Today we go big… and tomorrow we’ll hit the gym.

img-2015-10-06-0449

Slovak Potato Dumplings with Plums and Marzipan

(makes about 15 dumplings, depending on the size of the plums)

Potato Dough:
  • 600 g (1 lb. 5 oz.) starchy potatoes
  • Pinch salt
  • 100 g (3.5 oz.) cream of wheat/wheat farina
  • 150 g (5.5 oz.) all-purpose flour
  • 2 tablespoons potato starch (optional)
  • 1 large egg
Filling:
  • 700 g (1 lb. 8 oz.) small fresh plums
  • 50 g (1 – 2 oz.) marzipan, diced

+ 4 tablespoons each ground poppy seeds/walnuts, powdered sugar, and melted butter

img-2015-10-06-0444

Method:
  1. In a big pot, cook whole, unpeeled potatoes until soft. When the potatoes are cool enough to handle, peel them and chill them for at least 2 hours before proceeding. (I usually cook the potatoes the night before).
  2. While the potatoes are cooling, carefully slit each plum so that you can remove the pit. Don’t cut all the way through, so that the two halves still remain together. Replace the pit with a piece of marzipan. Set the plums aside.
  3. Make the potato dough: Run the cold potatoes through a potato ricer or grate them on the smallest opening of the box grater. Transfer the potatoes to a big bowl, add all the remaining ingredients and mix, until everything comes together and forms a soft dough. (Alternatively, you can mix the dough in your stand mixer fitted with a dough hook.)
  4. Making the dumplings: Tear off uniform portions of the dough, just big enough to cover each plum. Make sure to enclose the entire plum in the dough. Roll the dumpling between your palms to make a nice smooth ball. It’s important to work somewhat fast while making the dumplings, because the potato dough gets stickier as the time goes on. To combat the stickiness, use a little more flour/farina as needed.
  5. In a large pot, bring water to a boil. Lower the heat to a simmer. With a large spoon, one by one carefully lower about six dumplings into the water. Stir once to prevent them from sticking to the bottom of the pot, and cook until the dumplings rise to the surface, 5 – 7 minutes, depending on the size of the dumplings.
  6. With a slotted spoon, remove the dumplings from the pot and transfer them to a big shallow pan. Brush them with a little butter so that they won’t stick together and continue cooking the remaining dumplings in the same way.
  7. Serve hot with more melted butter and a generous dusting of poppy seeds or walnuts and powdered sugar.
Note:

If you wish to freeze the dumplings for later use, flash-freeze uncooked dumplings on a tray lined with parchment paper, and when they’re frozen, transfer them to heavy-duty freezer bags. When ready to use, cook the dumplings from frozen same way you would cook fresh. They will just take a little more time to cook compared to the fresh ones. You can also freeze already cooked dumplings, just make sure to let them cool completely before flash-freezing on a tray. If I do that, I flash-freeze them on a paper tray, and when they’re frozen, I stick the entire tray into a Ziploc. Then you can either gently steam them, or just nuke them in the microwave.

To make the dumplings gluten-free, replace the all-purpose flour with your favorite gluten-free flour mix and instead of the wheat farina, use hot rice cereal or finer cornmeal. (I haven’t been able to find fine rice cereal and usually just run the coarse-ground cereal through my Vitamix to make it finer.) The gluten-free dumplings are just a bit more sticky than the regular ones – nothing that couldn’t be helped by a little more melted butter! (I haven’t tried to freeze the gluten-free version, though.)

Spiced Pear Chocolate Caramel Cake

This week marked our wedding anniversary – unbelievable twenty years. Mountains and valleys, leavings and comebacks, withdrawals and togetherness. Loving another person is not easy. The man I stand next to today is certainly not the guy I married… the guy I promised to love but in fact had no clue how. The only thing I knew was that I wanted to.

And I still do.

We’re so different from where we started – young and eager to do life together. The journey brought us immense joy… and also challenges I’d never have anticipated on my wedding day; where the only thing one could do was to take the next step. Through clenched teeth, in the dark.  But as for me, all those growing pains have been worth it… because knowing there is this one person you can  come home to every day to is the best.

Thanks to all those years living with a photographer I learned one thing. Everything is always about the light. You might have wrinkles deep as canyons and countless blemishes inside and out, but when a photographer loves you, he makes sure to show you in just the right light. Suddenly, you’re flawless. And beautiful.

And that’s what he does for me.

***

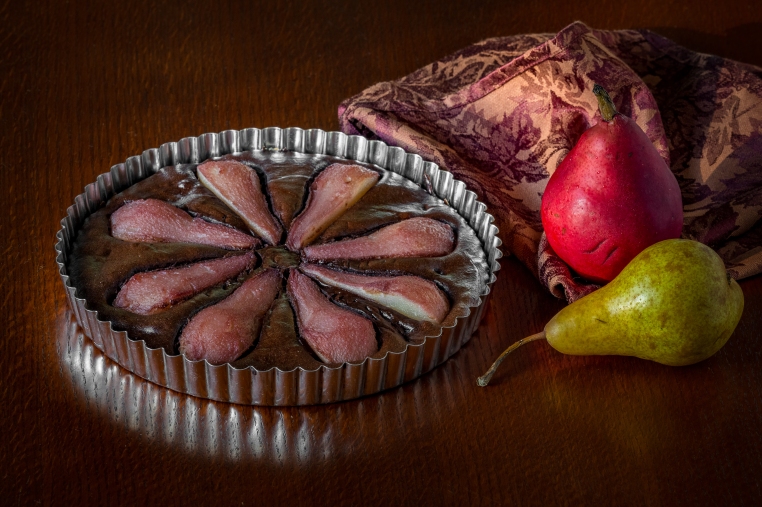
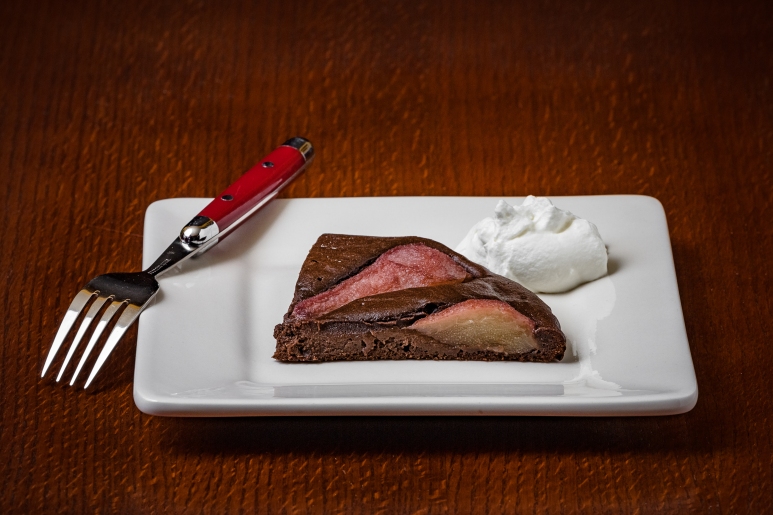
And the cakes are something I do for him. He doesn’t like cakes that are too airy and fluffy, and prefers something more substantial to sink his teeth into. When I came across this recipe, it had Mr. Photographer’s name written all over. First, THE CHOCOLATE – dark and bitter. Then, autumn pears poached in WINE which made them fragrant and delicious. And lastly, WHISKEY! The recipe called for 1 tablespoon, but I am not exactly known for following recipes, and prefer to play in the kitchen… so  I added a good splash 🙂 If that’s not a “manly” cake, I don’t know what is!

img-2015-10-03-0418

Spiced Pear Chocolate Caramel Cake

(adapted from http://84thand3rd.com)

Cakes:
  • 1 cup white sugar
  • ¼ cup golden brown sugar
  • ¼ cup water
  • 100 ml red wine
  • 150 g (5 oz.) butter
  • pinch salt
  • 100 g (3.5 oz.) bittersweet chocolate, broken up
  • 1 tablespoon whiskey
  • 2 large eggs
  • ½ cup buttermilk
  • 35 g (½ cup) unsweetened cocoa powder
  • 130 g (4.5 oz.) unbleached all-purpose flour (for gluten-free option see Note)
  • 1 teaspoon baking powder
  • ¼ teaspoon baking soda
Wine poached pears:
  • 4 firm pears, peeled, halved, and cored
  • 1 ½ cups each water and red wine
  • ½ cup sugar
  • 1 teaspoon ground cinnamon
  • ¼ teaspoon ground ginger
  • ¼ teaspoon ground cloves

+ 1 cup heavy whipping cream whipped with 2 teaspoons powdered sugar (for serving, optional)

img-2015-10-03-0440

Method:
  1. To poach the pears, combine wine, water, sugar, and spices in a saucepan. Bring to a simmer. Carefully add pear halves to the poaching liquid, and cook over low heat until the pears are just tender. Don’t overcook. Remove the pears from the wine syrup (reserve the liquid), let them cool, and then cut each half in half again, so that you will have 16 quarters. Reduce the poaching liquid by half, and serve as a syrup with the cake, if desired.
  2. For the cake, butter and flour two 9-inch (23 cm) tart pans with removable bottom. (If you’re making the cake for a person that’s gluten – intolerant, make sure to use a gluten-free flour for this.) Line the pans with parchment paper and preheat the oven to 350 °F (180 °C).
  3. Make the caramel: Combine sugar and water in a deep non-stick pan and bring the mixture to a boil. Turn the heat down and let simmer until the water evaporates and the sugar turns nice golden color. Don’t stir, because stirring encourages crystallization – just gently swirl the sugar syrup in the pan from time to time. When the water evaporates, watch the sugar closely, and take it off the heat the moment it starts to caramelize – it will continue to darken even off the heat, and you don’t want it to burn.
  4. When the sugar turns to caramel, immediately pour the wine over it (it will sizzle and the caramel will crystallize). Return the pan to the heat, bring to a boil, remove from the heat again and stir, until the caramel melts.(This took a while.) Add the butter and salt. Lastly, add the chocolate, and stir until the mixture is smooth and glossy. Stir in the whiskey and let the mixture cool slightly.
  5. To make the cakes, combine the flour, cocoa, soda, and salt. Set aside.
  6. In a small bowl, whisk the eggs. Slowly and carefully add about a third of the caramel – chocolate mixture, whisking constantly, to temper the eggs, and then combine the tempered eggs with the rest of the caramel – chocolate mixture.
  7. Add in the dry ingredients, alternating with the buttermilk, and ending with the flour mixture. Stir just until combined.
  8. Pour the batter into prepared pans and smooth out the tops. Carefully arrange 8 pear quarters on top of each cake.
  9. Bake for about 25 minutes until just firm in the center. Let the cakes cool in pans before removing. Serve with whipped cream and sweet wine syrup if desired.
Note:

If making the cake gluten-free, swap the all-purpose flour for your favorite gluten-free mix. (Be sure to add 1 teaspoon xanthan gum, if your mix doesn’t contain it already.)