It’s that frightful time again: time to cast some nasty spells, and to eat, drink, and be scary. No, silly, not PMS… although yes, in our household all of the above applies during that week of the month too: If I don’t have enough wine and chocolate on hand, it has the potential to not turn out pretty and someone might even get hurt. But this time I’m talking about Halloween – the creepy and excessively orange fall holiday that’s quickly approaching.
When you think about it, all of us desperate (house)wives should just love Halloween – it’s the one time when you don’t need to feel ashamed of your less than stellar housekeeping skills and can proudly display all the cobwebs creeping from the corners of your house, and there is no need to bother with make-up when going out either, because if you dig out some holey old hat and jam it on three day old hair, you can pretend you’re going as an old witch for Halloween, and all the zits, red splotches, and dark circles are part of the character you just spent an hour to create.
Despite all of the obvious advantages and years of living in the jack-o-lantern loving land, I admit Halloween still hasn’t quite grown on me. I’m not exactly sure why… maybe because if I’m to be honest I don’t really enjoy random strangers coming up to my door? Or perhaps it’s the fact that I am way too easily startled and literally jump up and yell when Mr. Photographer as much as says “honey, I’m home” behind my back? I really and truly don’t need any moving blinking skeletons lurking around the corner! And it probably doesn’t help that I’m well over the trick-or-treating age and can’t collect candy door to door anymore 🙂 (Mother’s confession: I used to secretly steal couple of chocolates from the boys’ baskets, hide in the pantry and binge on them on Halloween night – but hey, I didn’t want my offspring to end up with cavities or become obese at a young age, plus, I more than deserved some chocolate after dealing with them on their Halloween sugar high!)
Anyway, I might not be too keen on Halloween, but I still love my kitchen playground, and Halloween without a doubt offers wonderful opportunities to play, so I’ve resolved to make peace with it. Last year we made these Halloween eyeballs that turned out so realistic that the boys refused to touch them and poor Mr. Photographer had to eat them all. Such sacrifice on his part, all that sweet and creamy panna cotta… but what a guy wouldn’t do to make his wife happy 🙂 This time I wanted something equally gruesome, and at the end I’ve decided to try my hand at the burnt zombie hand meatloaf. I’ve never been one to follow recipes closely, and am more of a “a little bit of this and a pinch of that” kind of person, and even though I think of myself as more of a baker than cook, cooking actually lets you to play more compared to baking. If you forget to add baking soda or some other leavening when making a cake, your cake will probably be more brick-y than cake-y. But in cooking it doesn’t really matter if you use one or two teaspoons of oregano, or if you omit it altogether. So I was happy to play cook for a change, and as you can see, I had too much fun! I planned to get a gelatin hand mold from Amazon, but of course forgot about it until it was too late. I had to improvise, and a basic cleaning glove came to the rescue. The meatloaf was gently poached and then baked in the oven with some cheese on top to give the hand that halloweenish burnt skin look. I tried to make it as realistic as I could, complete with the purple onion nails and white onion bone sticking out. I also whipped up some mashed potatoes and piped them into bootiful little ghosts – and dinner was served. I wasn’t sure if my men would declare it yum or yuck… but they were happily ripping off the fingers one by one, stuffing their faces and making repulsive jokes the way only teenagers can.
So if you happen to have a pound of hamburger in your freezer, give this eerie meatloaf a try. It’s terrifyingly easy to make, and finger-licking delicious – a perfect candidate for a fright night dinner!

Burnt Zombie Hand Meatloaf with Mashed Potato Ghosts
For the meatloaf:
- a little over 1 lb. (450 g) ground beef
- 1 medium onion, diced
- 2 cloves garlic, minced
- 4 strips bacon, diced
- 2 slices bread, ground up
- handful of parmesan, grated
- handful of fresh parsley, chopped
- 1 egg
- 1 tbsp. Dijon mustard
- 2 teaspoons oregano
- salt & pepper to taste
- extra cheddar cheese (for the meatloaf skin)
- red onion (for nails)
- a glove
For the blood curling red sauce:
- 2 tablespoons olive oil
- 1 fresh chilli pepper, minced
- 425 g (15 oz.) can of small white beans
- 425 g (15 oz.) can of diced tomatoes
- 1 cup (250 ml) beef/chicken broth
- 2 tablespoons tomato paste
- 2 teaspoons Tabasco sauce
- salt & pepper to taste
For mashed potato ghosts:
- 1 kg (2 lbs.) yellow potatoes, peeled and diced
- 2 tablespoons butter
- up to ½ cup sour cream
- 2 egg yolks
- salt & pepper to taste
- small can of sliced black olives
Method:
- To make the Zombie hand: In a big bowl, mix all the ingredients for the meatloaf. Season to taste and combine well. Pack the mixture tightly into the glove, making sure there are no air bubbles. Close up the top of the glove with a rubber band or string and place the filled glove into a Ziploc bag. Poach the meatloaf in boiling water for 30 minutes.
- While the meatloaf is cooking, prepare the red sauce: Sauté the onion in olive oil for couple of minutes until softened. Add in all the remaining ingredients except beans and cook for about 15 minutes, stirring occasionally, until the mixture thickens to your liking. Mix in the beans and combine. Season to taste.
- When the 30 minutes are up, carefully remove the meatloaf hand from the water and let it cool completely still in the glove. Transfer the glove into a baking pan and cutting away pieces of glove with scissors, carefully remove the meatloaf. (I didn’t need to, but if a finger falls off, you should be able to re-attach it with a toothpick). Preheat the oven to 350 °F (176 °C). Pour the red sauce around the meatloaf in the pan. Brush some of the sauce on the meatloaf and sprinkle the meatloaf generously with cheddar cheese. Cut out the nails from the red onion and place them on fingers. Bake the meatloaf for about 30 minutes, until the cheese melts and forms a nice crust. (I covered the nails with aluminum foil at the end, and placed the meatloaf under a grill for couple of minutes. If you do this, watch the meatloaf closely so it doesn’t burn. 1 – 2 minutes should be enough.)
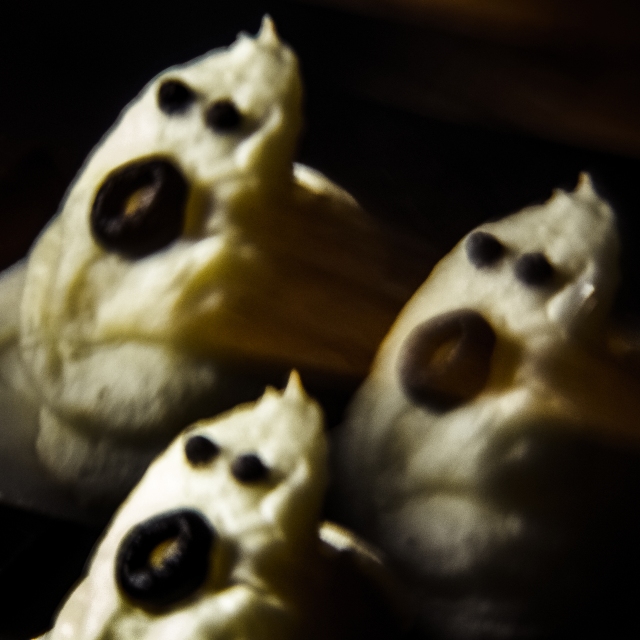
- For the mashed potato ghosts, cook the potatoes in salted water until soft. With a potato masher, mash them up with butter and sour cream. (Add the sour cream gradually, and don’t overdo it – you need the mixture to be pretty thick so that the ghosts will stand up when piped onto the baking pan. The original recipe actually called for milk, so I used it, and then had trouble to keep my ghosts upright 🙂
- Form the ghosts: Butter a baking pan or line it with parchment. Preheat the oven to 350 °F (176 °C). Transfer the potato mixture into a big Ziploc bag, cut off one corner, and form small conic mounds onto the parchment. Using sliced olives and peppercorns, create faces on your ghosts. Bake the ghosts for about 10 – 15 minutes, until they firm up and turn nice golden brown on top. If they’re not browning enough, put them under the grill as well for a minute.
- Put the zombie hand onto a serving plate, arrange a couple of potato ghosts around, lovingly invite your family to the dinner table, and watch them freak out 😀